Yucky stomach bug, you can leave my house now!!!! Dallas started complaining a few days ago that her belly was hurting. For the first few days she was acting just fine, so she still went to school and played as normal. But, Thursday she really started complaining. She woke up at 2 AM and was up all night. She never threw up that night just whined and moaned that her belly hurt.
I kept her home from school on Friday and for most of the day she whined and moaned complaining that her belly hurt. 4 kids were out in her class yesterday due to the stomach bug...yuck! I don't like stomach bugs, especially the one she got. There always seems to be three versions:
1 - The throw-up bug...Where you throw up and throw up and until you can't anymore. The good thing about this one though is that it usually lasts only 24 hours and you're done.
2 - The diarrhea bug...This one is somewhat like the throw up bug. You have to go to the bathroom a lot, and your stomach cramps some but it usually lasts only 24 hours too and you're done.
3 - The stomach cramping bug...This one has to be the worst. Your stomach cramps and makes you miserable. You can't eat or drink without your stomach cramping to where you're in the fetal position. With this one, the worst part is that it lingers. Your stomach cramps for days and it's hard to get rid of.
Unfortunately I have have to say Dallas seems to have stomach bug #3...the worst kind. She has just been miserable.
I'm trying to feed her some of the B.R.A.T. diet and lots of fluids. The only thing that seems to not hurt her belly is plain bread. And now she's sipping on some Gatorade. I just feel terrible for her. She is not a happy camper. She's only thrown-up once (yesterday) and went to the bathroom (you know, poopy - once today). This thing seems to just linger and it's NOT FUN!!! I hope she feels better soon and more importantly that no one else gets this yucky bug!
Saturday, July 30, 2011
Thursday, July 28, 2011
No-sew Curtains
So, it's been a few nights since I last wrote, but I've been a busy bee creating my latest project...no-sew curtains.
***Warning*** If you are an established sewer, you might want to turn away, because you might cringe, but for me it works because I am NOT a sewer...wish I were and strive to become one, but that would require me to buy a sewing machine first.
Back to the matter at hand, my new curtains. I re-painted my dining room, to give it a fresh face, and needed new curtains. (BTW, the dining room project will have it's own post when it's finished...which could take a while).
I had a vision in my head of what I wanted my curtains to look like. I love the ones that are solid at top and have a different color at the bottom. Well, I couldn't find any in stores that I liked for my fresh new blue room. I'm going with a muted lime green, if you will, for the accent color in there. It's bright and very fresh looking.Well, once I couldn't find any curtains I decided to make some. Um, problem. I don't know how to sew or even own a sewing machine. On to plan B...use hem tape and fabric adhesive tape. Once I got everything (list is at the bottom) I was excited to get started. Here's how it all went down.


When I got home, I wanted to get started right away, but you and I both know that doesn't happen with two young kids. I already bought the green fabric at JoAnn's a few months back, so I was set. The next day, I laid out the curtains to measure them. The panels I bought were 84" long, and I wanted the curtains to be 94". Once the panels were laid out, I then placed the green fabric on top to measure it all and figure how big I wanted the green panels.

I decided that I wanted the green panels to be 20" long and the white panels to be 74". I also measured how wide I needed to cut the green fabric and decided they needed to be 44inX22in. I went over 2 inches so I could put a 1inch hem on all sides.
After measuring it all out I cut out the green fabric.
 And now I had two green panels and two white panels...one step closer to my perfect curtains.
So the next night I started all over, measuring, checking, and rechecking to make sure they were perfect before I ironed on the hem tape. Now I was ready to go.


Here, I'm measuring and ironing a seam so I can add my hem tape.

 I measured out how much hem tape I needed and cut it. Then I tucked it carefully under the 1 inch seam I made and ironed it on, following the directions on the package.
 The key is to hold the press for a few seconds and then let it cool.
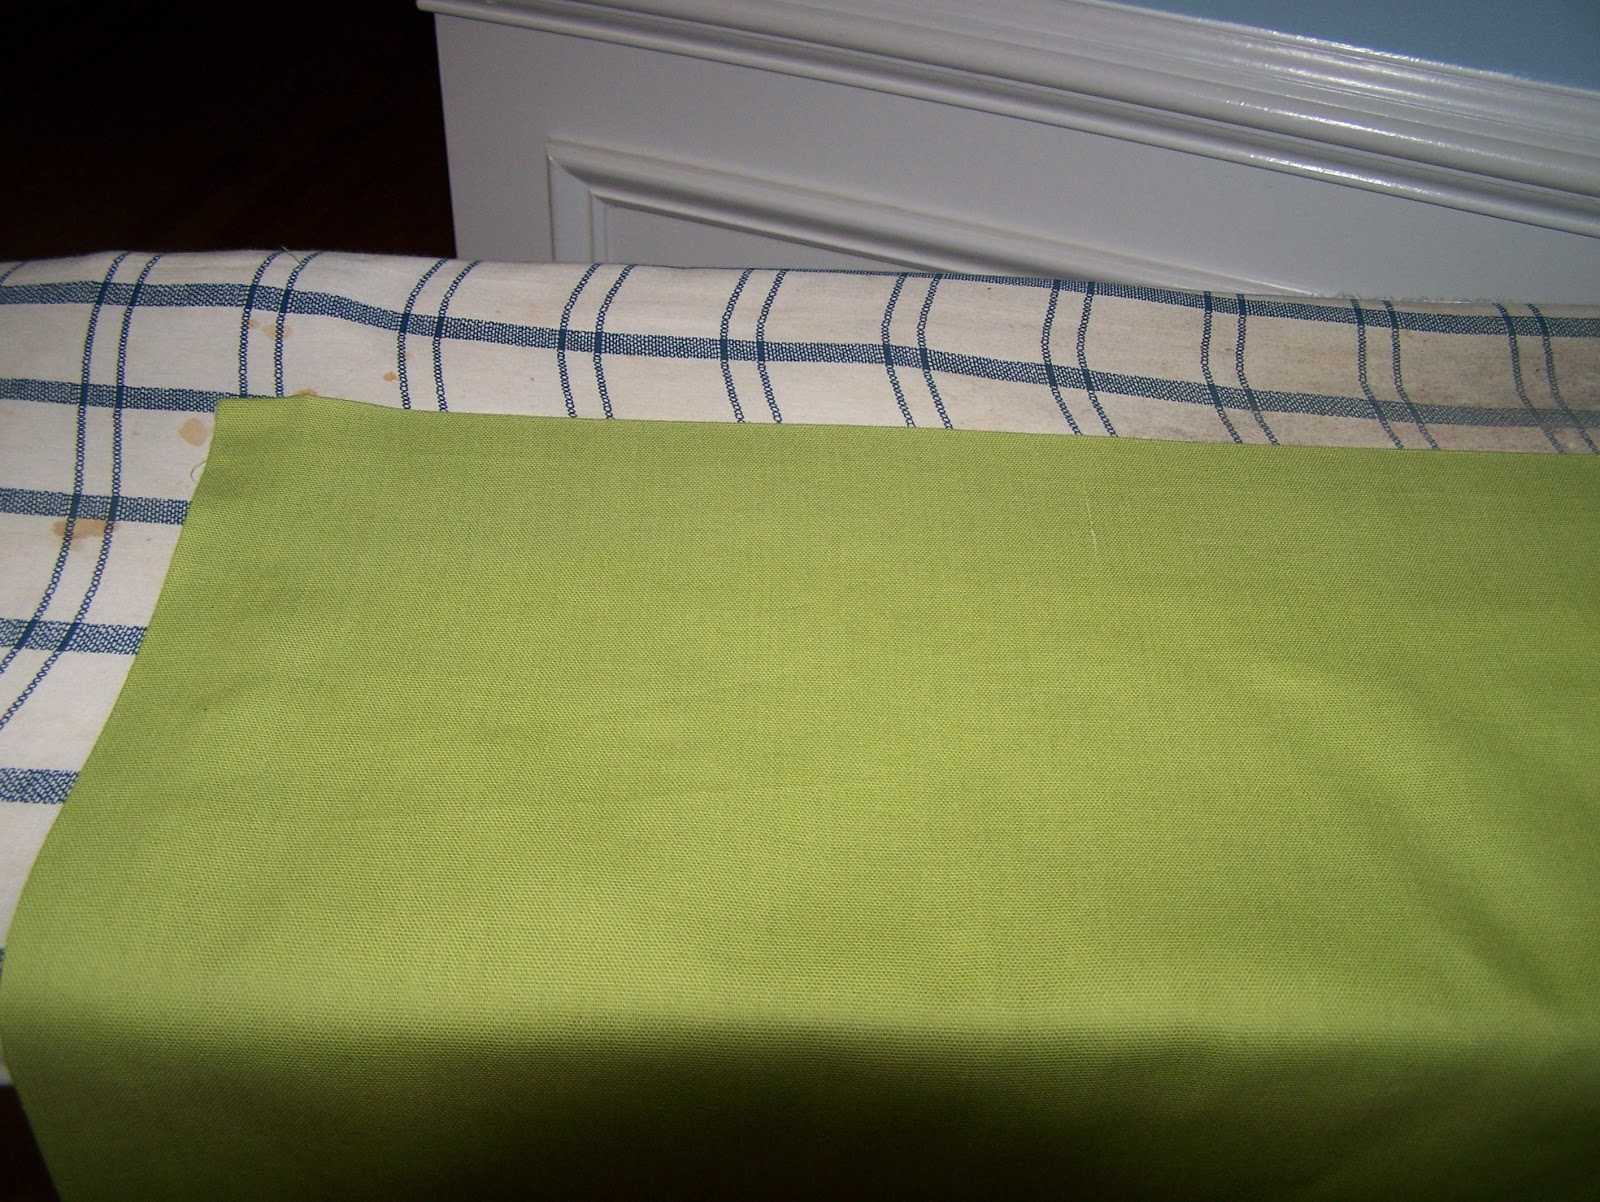
And, wha-la I have a perfect hem...well maybe not perfect but who's checking?
After the green panels were "hemmed" I laid a white panel out on the floor and very carefully measured 74 inches from the top along the whole width, and placed a few pins along the way.

 The next part was kind of a trial and error situation. With the first curtain, I attached the iron-on adhesive tape to the green panel and then added it to the white panel, again following directions on the package and holding the hot iron for a few seconds along the way.
The adhesive tape was different from the hem tape a bit and I had to iron on the tape with the paper on and then remove the paper after it cooled and iron the green panel onto the white panel.


 With the panel laid flat on the floor, it was much easier to make sure all the edges met and ironed on correctly.
I also found with the second one that it was much easier to iron on the adhesive tape to the white panel and then iron the green panel on top.

Almost finished, I promise. Once both green panels were ironed on and cool, I then moved on to the ribbon trim. I found the perfect blue ribbon that matched the blue walls, so I picked it up. I'll spare you all the details of the problems I ran into here as well. But just know, I measured out the ribbon and cut it.  I decided I would try the liquid stitch this time. I followed directions and applied.
 I decided I would try the liquid stitch this time. I followed directions and applied.


So, are you ready yet??? I was so excited I could barely sleep last night. To me they are perfect; exactly what I had pictured in my head. I hung them and I am so excited. I hope you like them as much as I do.


Things you need to make curtains like these:
2 Panel curtains (in length you want)
Fabric (to cut into the sizes that you want according to how big you want the panels)
Tape Measure
Pins
Scissors
No-sew super strong hem tape (I used 1 roll)
No-sew super strong iron-on adhesive tape (I used 1 roll)
Iron/Ironing board (or white towel like I used)

Sunday, July 24, 2011
Peach Cobbler
This one is a family favorite that's been in my family for years and is so easy! You have to try it.
Ingredients:
1 - 28 oz can sliced peaches cut in half
3/4 cup sugar
1 cup self-rising flour
1 tsp. vanilla
1 cup milk or peach juice
3/4 stick butter

Preheat oven to 350 degrees. While oven is heating up, place butter in 8X8 baking dish and melt butter in oven.
Meanwhile, cut peach slices in half and set aside.
Mix together sugar, flour, liquid (I use the peach juice from the can, but you can use milk if you'd like), and vanilla.
 When butter is melted and oven is preheated, remove dish from oven. Place peaches in butter in dish and top with flour mixture.
 Bake 50-60 minutes or until golden brown and bubbly. Let stand at least 5 minutes before serving. Best served with vaniall ice cream.

Ingredients:
1 - 28 oz can sliced peaches cut in half
3/4 cup sugar
1 cup self-rising flour
1 tsp. vanilla
1 cup milk or peach juice
3/4 stick butter

Preheat oven to 350 degrees. While oven is heating up, place butter in 8X8 baking dish and melt butter in oven.
Meanwhile, cut peach slices in half and set aside.
Mix together sugar, flour, liquid (I use the peach juice from the can, but you can use milk if you'd like), and vanilla.


Tomato Pie
My daddy's been telling me for months now that I need to add this to my recipes, but I haven't made it for a while and needed pictures to go along. Well, I made it tonight so here we go. I tweeked the recipe I've made in the past and mixed a couple of recipes together to make this one. I think it's a winner...very summery.
Ingredients:
1 Philsbury pre-made pie crust (I used the one in the refrigerated section)
4 medium tomatoes cut into thin slices
1/2 tsp. salt
1/2 cup mayonnaise
1/3 cup chopped onion (I cooked them for 2 minutes in the microwave in a little water - just takes the crunch out)
1/4 cup chopped fresh basil and thyme
1 cup shredded extra sharp white cheddar cheese

Preheat oven to 350 degrees. Roll out pre-made pie crust and fit into a 9-inch pie plate (sprayed with Pam). Fold over edges and press all air out of the crust. Bake shell for 10-12 minutes or until lightly brown. Remove from oven and set aside.
Meanwhile, slice tomatoes and place them on a single layer of paper towels. Sprinkle with salt and let stand 15-20 minutes. Pat dry with paper towels...make sure you do this really well.
Mix together mayonnaise, onion, herbs, and 3/4 cup cheese.
When pie crust is ready, sprinkle with the remaining 1/4 cheese. Layer tomatoes on top of cheese, and top with mayonnaise mixture spreading evenly.


Bake for 30-35 minutes. Let cool 5 minutes before serving.

Ingredients:
1 Philsbury pre-made pie crust (I used the one in the refrigerated section)
4 medium tomatoes cut into thin slices
1/2 tsp. salt
1/2 cup mayonnaise
1/3 cup chopped onion (I cooked them for 2 minutes in the microwave in a little water - just takes the crunch out)
1/4 cup chopped fresh basil and thyme
1 cup shredded extra sharp white cheddar cheese

Preheat oven to 350 degrees. Roll out pre-made pie crust and fit into a 9-inch pie plate (sprayed with Pam). Fold over edges and press all air out of the crust. Bake shell for 10-12 minutes or until lightly brown. Remove from oven and set aside.
Meanwhile, slice tomatoes and place them on a single layer of paper towels. Sprinkle with salt and let stand 15-20 minutes. Pat dry with paper towels...make sure you do this really well.
Mix together mayonnaise, onion, herbs, and 3/4 cup cheese.
When pie crust is ready, sprinkle with the remaining 1/4 cheese. Layer tomatoes on top of cheese, and top with mayonnaise mixture spreading evenly.

 |
| Mommy's little helper |


Sunday Supper
Let me start by saying that only if you're from the south do you know that the pronunciation of Sunday Supper is not as it appears...you say it like this: Sundee Suppah. That's just how it is...
There were two things I loved about Sunday growing up and that was church and Sunday supper {did you say it like you're supposed to? If not, try again...it sounds so much sweeter.}
I think I've explained to y'all before that my Mama was the best cook in the world. I learned everything I know from her. She was a bit of a super mom, and I used to tease her and call her June Cleaver all the time. Everynight we had a home-cooked meal on the table and they were all g.o.o.d {well, except for the night of the stuffed flounder and brown rice...that night the water was good}. So, come Sunday there was nothing new, we all knew we were going to get a good meal, but all the cards came out on Sundays. She'd make the best of the best those days. You know, fried chicken {back before fried was bad for you}, mashed potatoes, creamed corn, fried green tomatoes; or pot roast and all the fixin's; or Corned beef and cabbage. If I close my eyes I can see and smell all those meals being cooked in our tiny kitchen.
These days we don't have the Sunday Suppers like I had as a child. I try to do a little something special on Sundays {you know, the kind of meals that are not quick, weeknight meals}, but that doesn't always happen. Today I decided it was time for a Sunday Supper {review...Sundee Suppah...just making sure you're still with me}.
It's been so hot here no one has really wanted to eat too much, so I tried to come up with something light and summery. So, here's our menu:
Grilled Italian Chicken
Tomato Pie
Butterbeans
Candied Carrots
And Peach Cobbler for dessert {gotta have dessert on Sundays}
 What a meal! It was so delicious. The chicken was easy. Just marinate it in some Italian dressing and grill {that's Eric's job}.
I'll post the recipes for tomato pie and peach cobbler because you have to try these...definite staples in our house repertoire.
The butterbeans, I must admit I pulled an old Sandra Lee. Sometimes I do make butterbeans from scratch, but yesterday I found Allen's brand butterbeans in southern seasoning and vidalia onion...might not ever make the real ones again. Yes, I ate canned butterbeans, but I'm telling you they were so good and hearty. I loved them.
And, the carrots were an old take on my Mama's candied carrots she made when I was a kid. I took some baby carrots, a little butter (about 1 1/2 Tbsp), and covered with water. I simmered for about 8-10 minutes until crisp tender. I drained most of the water (but left a little), and added about 2 tsp brown sugar. I returned to heat and simmered on low a few more minutes. They were awesome! The kids loved them too.
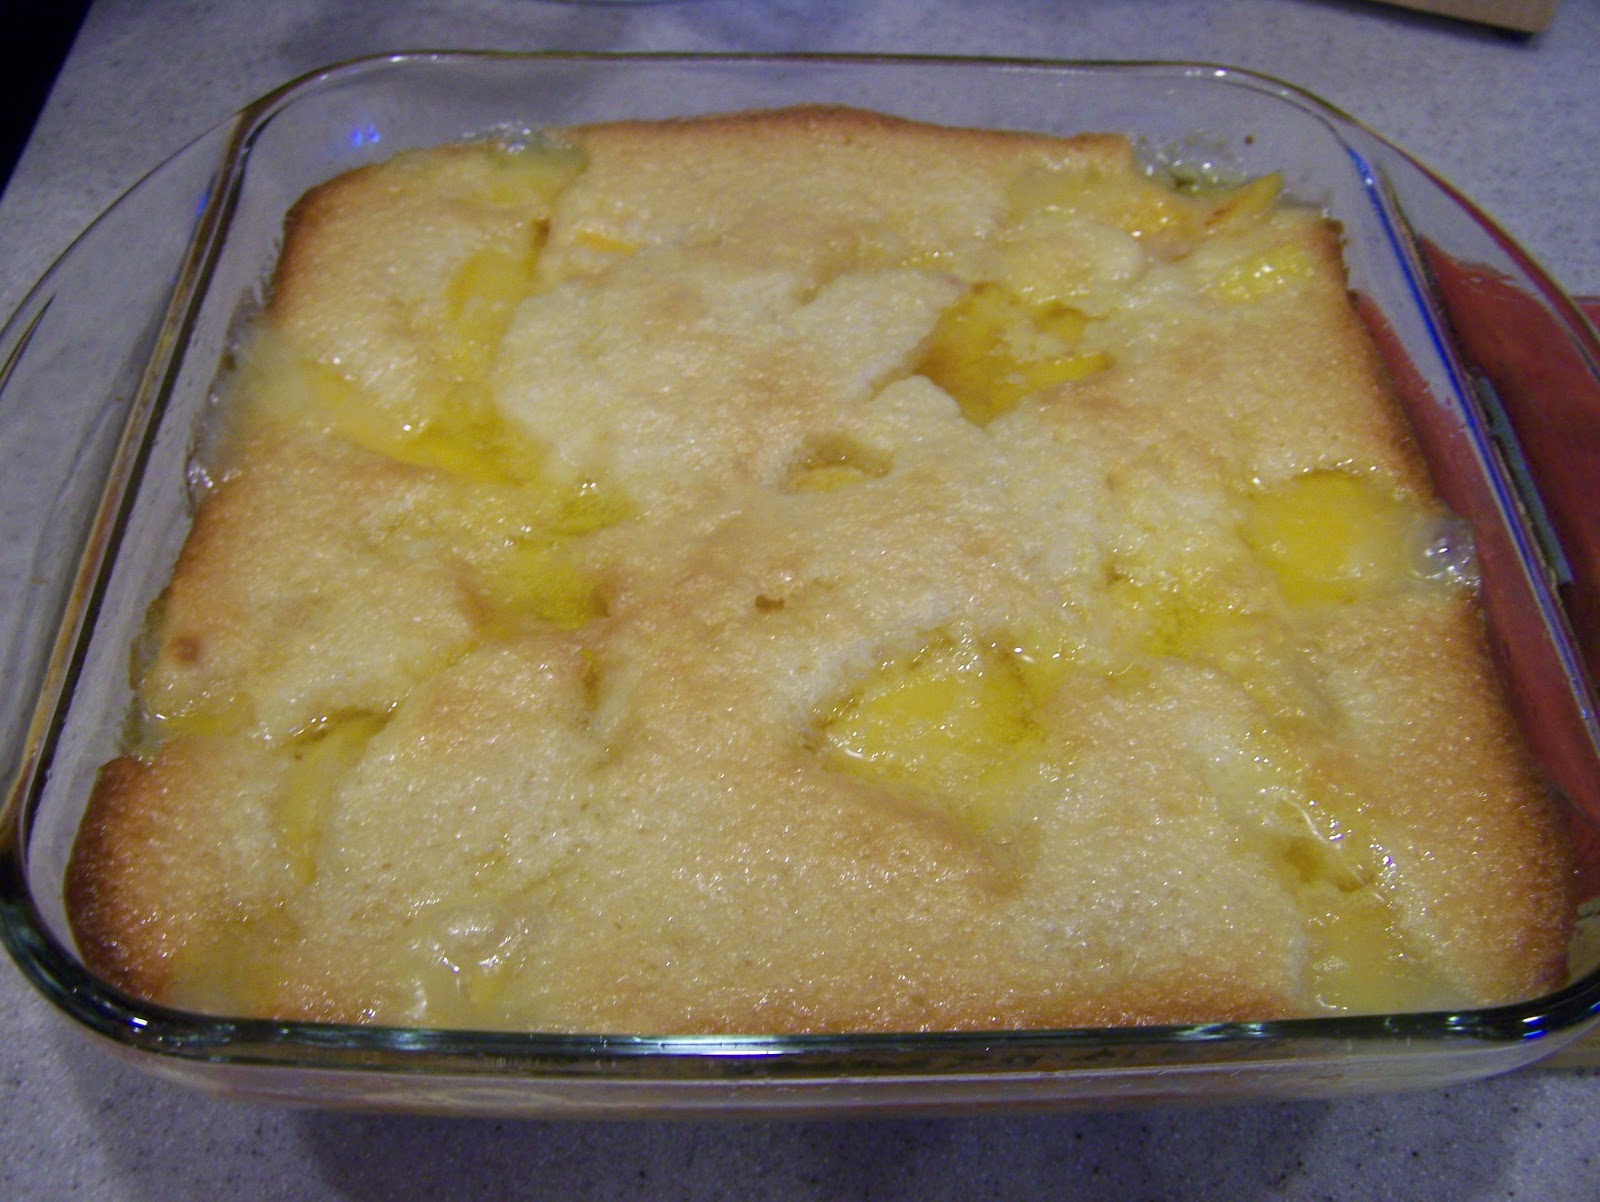
Are you full yet??? Well, supper's not over. Now time for dessert...a great old southern staple...peach cobbler and vanilla ice cream. It was suculant and literally melted in my mouth.
Now my belly is full and I'm thinking I might need an extra run in the morning, but full belly or not, today reminded me of just why I love Sundays...Church and Sundee Suppahs!
There were two things I loved about Sunday growing up and that was church and Sunday supper {did you say it like you're supposed to? If not, try again...it sounds so much sweeter.}
I think I've explained to y'all before that my Mama was the best cook in the world. I learned everything I know from her. She was a bit of a super mom, and I used to tease her and call her June Cleaver all the time. Everynight we had a home-cooked meal on the table and they were all g.o.o.d {well, except for the night of the stuffed flounder and brown rice...that night the water was good}. So, come Sunday there was nothing new, we all knew we were going to get a good meal, but all the cards came out on Sundays. She'd make the best of the best those days. You know, fried chicken {back before fried was bad for you}, mashed potatoes, creamed corn, fried green tomatoes; or pot roast and all the fixin's; or Corned beef and cabbage. If I close my eyes I can see and smell all those meals being cooked in our tiny kitchen.
These days we don't have the Sunday Suppers like I had as a child. I try to do a little something special on Sundays {you know, the kind of meals that are not quick, weeknight meals}, but that doesn't always happen. Today I decided it was time for a Sunday Supper {review...Sundee Suppah...just making sure you're still with me}.
It's been so hot here no one has really wanted to eat too much, so I tried to come up with something light and summery. So, here's our menu:
Grilled Italian Chicken
Tomato Pie
Butterbeans
Candied Carrots
And Peach Cobbler for dessert {gotta have dessert on Sundays}

I'll post the recipes for tomato pie and peach cobbler because you have to try these...definite staples in our house repertoire.
The butterbeans, I must admit I pulled an old Sandra Lee. Sometimes I do make butterbeans from scratch, but yesterday I found Allen's brand butterbeans in southern seasoning and vidalia onion...might not ever make the real ones again. Yes, I ate canned butterbeans, but I'm telling you they were so good and hearty. I loved them.
And, the carrots were an old take on my Mama's candied carrots she made when I was a kid. I took some baby carrots, a little butter (about 1 1/2 Tbsp), and covered with water. I simmered for about 8-10 minutes until crisp tender. I drained most of the water (but left a little), and added about 2 tsp brown sugar. I returned to heat and simmered on low a few more minutes. They were awesome! The kids loved them too.
Are you full yet??? Well, supper's not over. Now time for dessert...a great old southern staple...peach cobbler and vanilla ice cream. It was suculant and literally melted in my mouth.
 |
| If you look carefully you can see it bubbling as it came out of the oven. |
Saturday, July 23, 2011
What to do???
What do we do when it's hot as blue blazes, and the air is thick as molasses? The kids are antsy to get out, but we can't do anything outside....yes it's almost too hot to go to the pool. I can think of a million things that I would like to do, but that's me, and the kids would not enjoy any of it.
So, what do we do on a very hot Saturday that would appease two young kids? It must be somewhere super fun and super cool. Hmmm, decisions decisions...
Well, the day is over and the heat is finally coming down. I have to admit, I've seen my car temperature read 100 and 102 degrees before, but today it read 110 degrees...now that is C.R.A.Z.Y.
So, there was no way we were spending any long periods of time outside. We decided to go to the movies. We first went to lunch at Applebee's. Eric wanted one of their salads, so off we went. The kids were a tad bit fussy (to say the least), but I'm chalking it up to the heat because let's be honest this heat makes everyone grumpy. Once we got food and lemonade in their bellies, though, they were a little happier.
We then went to the movies with the kids to see Cars 2.
 I guess everybody else had the same idea because the place was packed. After some squirming from the kids and begging for popcorn, we settled in and watched the movie...well some of it anyway. Overall, I thought the movie was really cute. I love Mater and think he totally stole the show.
After the movie, we came home and tried to stay in from the heat. I ran to the store and took my neighbor to get her car from the shop, but we tried our best to stay in and as cool as possible.
Looks like we're getting a "cool" front move through and it's going to be 98 degrees tomorrow..woohoo (can you hear the sense of sarcasim here?) We are definitely in the thick of summer and staying cool is our goal each and every day.
So, what do we do on a very hot Saturday that would appease two young kids? It must be somewhere super fun and super cool. Hmmm, decisions decisions...
Well, the day is over and the heat is finally coming down. I have to admit, I've seen my car temperature read 100 and 102 degrees before, but today it read 110 degrees...now that is C.R.A.Z.Y.
So, there was no way we were spending any long periods of time outside. We decided to go to the movies. We first went to lunch at Applebee's. Eric wanted one of their salads, so off we went. The kids were a tad bit fussy (to say the least), but I'm chalking it up to the heat because let's be honest this heat makes everyone grumpy. Once we got food and lemonade in their bellies, though, they were a little happier.
 |
| Eric and Hunter doing the activity book together. |
 |
| Dallas taking a quick break from her activity book. |
We then went to the movies with the kids to see Cars 2.

After the movie, we came home and tried to stay in from the heat. I ran to the store and took my neighbor to get her car from the shop, but we tried our best to stay in and as cool as possible.
Looks like we're getting a "cool" front move through and it's going to be 98 degrees tomorrow..woohoo (can you hear the sense of sarcasim here?) We are definitely in the thick of summer and staying cool is our goal each and every day.
Friday, July 22, 2011
Art boards
Last week on my hamster wheel I like to call life I decided to do a couple of projects...yes on top of Hunter in camp 4 days, Dallas starting Kindergarten, my husband traveling pretty much all week, working on Wednesday, the normal house chores, the gym, and a birthday party. Why not add projects in the mix...there are 24 hours in a day, right? :o)
The first one, just came to me as we found Eric's old bulletin board that he used to have in his office when he worked at home...it needed some sprucing up - no need to throw it away (even though I kept having to fish it out of the trash pile in the garage)...don't think hubby saw the potential I did.
 I had some left over fabric from when I made a cornice board for our bonus room. All I needed was buttons, ribbon, and spray glue, so off to JoAnn's I went. I picked up some spray glue. I've never used the stuff before but I am hooked. I LOVE this stuff.
 I found ribbon on sale for $1.99 for the spool...woohoo, and picked out some white buttons. I got home and wanted to start right away. I got out the fabric, measured and cut it, and ironed over the edges so they wouldn't fray.
 I then took the fabric and my new friend, the spray glue and went to the garage where the lonesome bulletin board was waiting. I then sprayed the board and kind of quickly placed the fabric on top. You kind of have to work quick.
 It had to sit for an hour, and it was time to pick Hunter up from camp, so I let it dry and off we went.
 The glue was dry and I then wanted to add the ribbon. I first hot glued all the edges around the back of the bulletin board so the fabric was secure on the front and back. I think I got too excited and forgot to take pictures of a lot of the next part...oops. But, I measured the ribbon and criss-crossed it in the directions I wanted. I started hot gluing the corners down on the back.
 Once they were all in place, I started to worry that they weren't going to stay. So, I got out my other trusty friend, the staple gun and went to work stapling the edges of the fabric and the ribbon...now it was secure.
Then, I took these huge needles (I think they were upholstery needles) and some white thread and actually sewed the buttons on the bulletin board. It wasn't hard but pushing the needles through was a little tricky. It made all the difference though because the ribbon is much tighter. I bought some big push pins at Wal-Mart, and there you have it!

 I love it! I hangs next to our oh-so-crazy monthly calendar in my laundry room. It already has it's first resident too...the hotel confirmation for when my hubby and I go away in a few week.
The second art board idea came to me while I was making the bulletin board. I've toyed with making art board some in the last few months, but haven't perfected them. They always turn out cute, but I don't have the pretty artsy handwriting that a lot of people have so I'm a little self-conscious about them.
We had a birthday party on Tuesday, and Monday afternoon I decide I'm going to make the birthday girl an art board but I wanted it different, I wanted to use my new favorite thing, spray glue. I already had the boards (again left over from the cornice board, and my sweet hubby had already cut them for me). I also had some left over fabric that I thought I could use. I bought some clips from the dollar spot and a spool of ribbon for $1.99 at JoAnn's on sale...I already had other ribbon too.
 (Oh, I was originally going to paint the center with magnetic paint, but it was old and dried up...oops...on to plan B).
I measured how big I wanted the center to be and drew it off on the backside of the fabric, and cut it out.
 Once that was cut, I took my friend, Mr. spray glue, sprayed the back of the fabric and quickly added it to the board. I didn't have an hour to let it dry, so I had to work around the drying of the glue.
 I used some painters tape that I had and taped around the edges so I wouldn't get paint on the fabric.
 I picked out a color to use for the center. I used purple. I was hoping that this could go in the birthday girl's room, but when I had to switch gears from the magnetic paint and went with purple paint I knew it wouldn't match. But hopefully they found a special spot for it.
I painted the center a couple of times...it was beginning to be crunch time before we had to leave for the birthday party, but luckily the paint dried fairly quickly. After painting, I hot glued the white ribbon around the edge to give it more depth.
 It was coming together, but I felt like it still needed more. So, I looked through my ribbon stash and found some pretty green and added it as well.
 I also added some white at the top to use as a hanger. Then, I hot glued on the the clips, and there you have it...an art board that I made in an hour and a half from start to finish...I sure hope they like it.

The first one, just came to me as we found Eric's old bulletin board that he used to have in his office when he worked at home...it needed some sprucing up - no need to throw it away (even though I kept having to fish it out of the trash pile in the garage)...don't think hubby saw the potential I did.


Then, I took these huge needles (I think they were upholstery needles) and some white thread and actually sewed the buttons on the bulletin board. It wasn't hard but pushing the needles through was a little tricky. It made all the difference though because the ribbon is much tighter. I bought some big push pins at Wal-Mart, and there you have it!

 I love it! I hangs next to our oh-so-crazy monthly calendar in my laundry room. It already has it's first resident too...the hotel confirmation for when my hubby and I go away in a few week.
The second art board idea came to me while I was making the bulletin board. I've toyed with making art board some in the last few months, but haven't perfected them. They always turn out cute, but I don't have the pretty artsy handwriting that a lot of people have so I'm a little self-conscious about them.
 |
| Here's the first one I did for a friend who loves pirates. |

I measured how big I wanted the center to be and drew it off on the backside of the fabric, and cut it out.
 |
| Don't know if you can see the pencil mark. |


I painted the center a couple of times...it was beginning to be crunch time before we had to leave for the birthday party, but luckily the paint dried fairly quickly. After painting, I hot glued the white ribbon around the edge to give it more depth.


Subscribe to:
Posts (Atom)